Root Samsung Smartphone
On this page, you will find the instructions to Root any Samsung Smartphone.
Requirements: Your Samsung device should have at least 30-40 percent of battery to perform the rooting process.
Root Samsung Smartphone using Odin
1. Download Samsung Usb Driver, Samsung Odin Downloader and Samsung Root File.

2. Install Samsung usb Driver on your computer (if alredy install then skip the step and follow the next step).

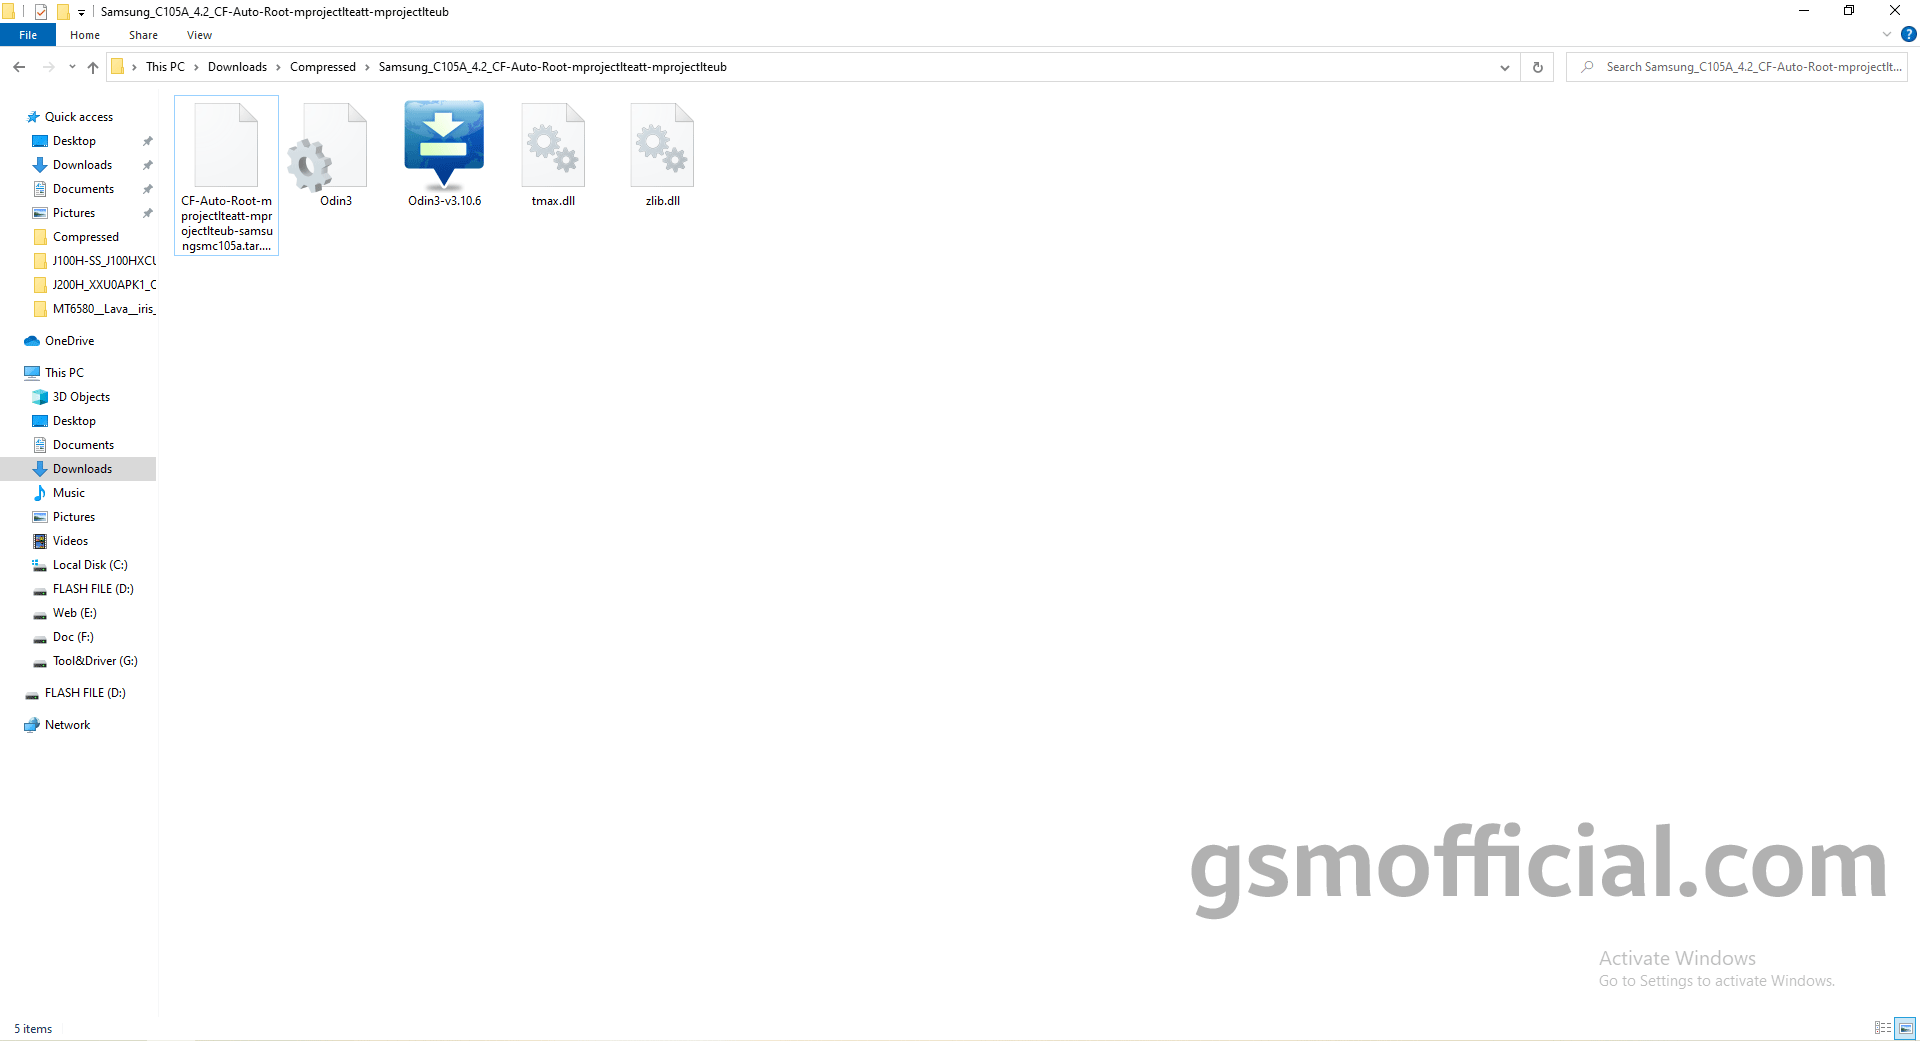
3. Extract the Samsung Root File. After extracting root file you will able see the following files.
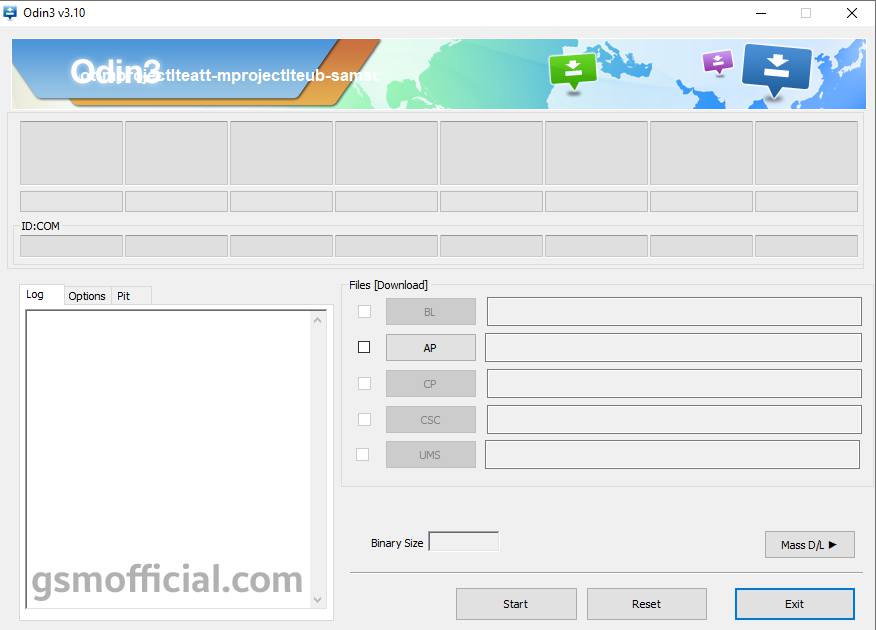
4. Now, open Samsung Odin Downloader Tool.
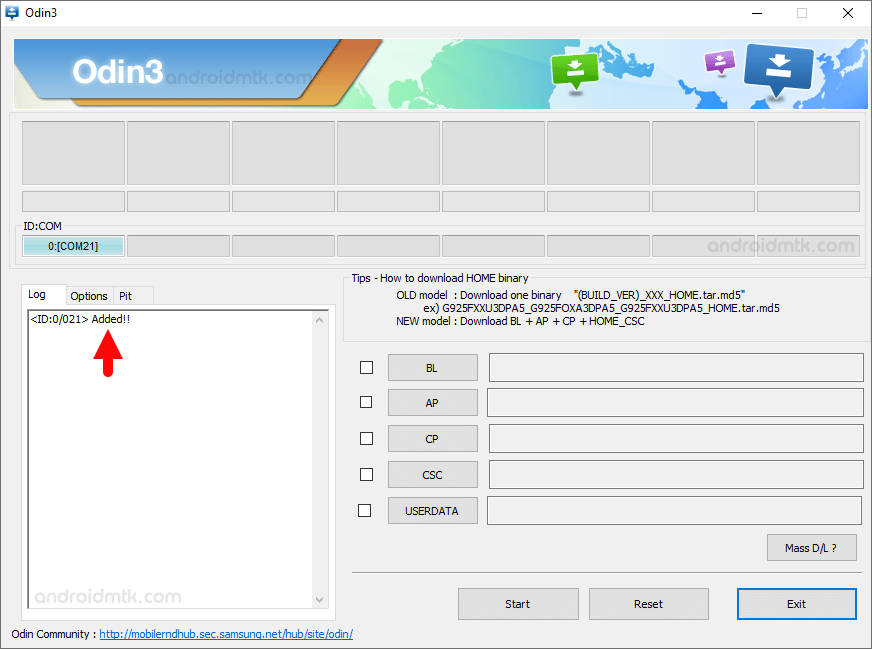
5. Connect your Samsung Smartphone into Download Mode. Press and hold Volum Download key, Home key and Power key together for Download Mode.

6. Once you have connected the Smartphone to the computer, Odin will automatically recognize the device and displays Added message at the Log Area.
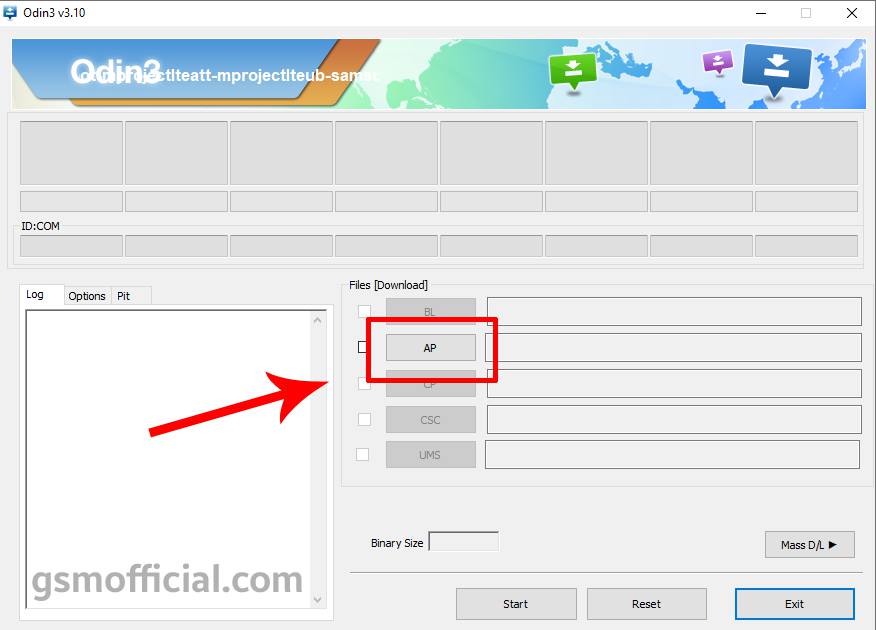
7. Click on AP and locate Root File (CF-Auto-Root).
8. Once you have successfully load the root file then click on Start Button to begin the Flashing.
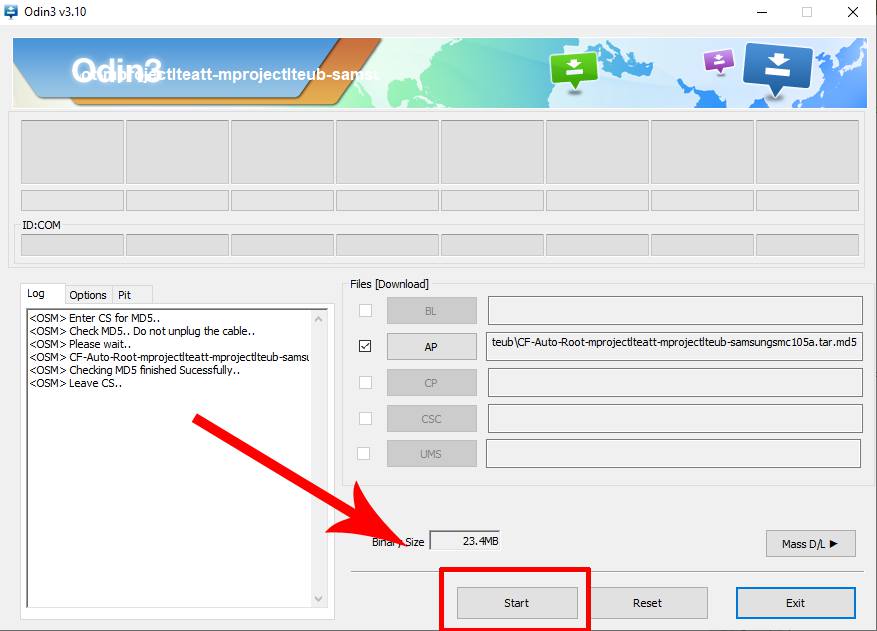
9. It takes 30-50 seconds to complete the rooting process on your Samsung sevice. Once Rooting process got completed, you will be able to see a green box with Pass written.
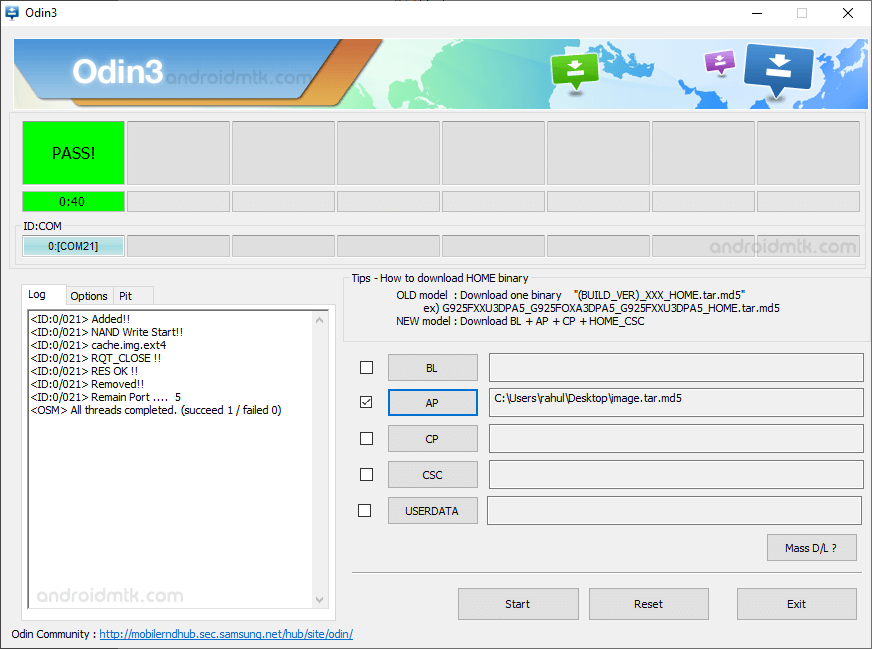
10. Now, to make sure you have successfully rooted your Samsung Galaxy device, open Applications Menu on your Smartphone and Find SuperSU app. This means you have successfully roted your device.

Readme once
[*] Caution : Your device will bricked by flashing wrong root file and warranty will void.
[*] Recommend: Always we recommend to use latest version of Samsung Odin Tool and use right root file.
[*] Backup : Take a backup of your important data before using the Odin Tool, as your personal data will be deleted after flashing the Stock firmware using Samsung Odin Downloader.
[*] Related Files : There are several related files are available for your Samsung Device including Samsung Combination File, Samsung ADB Enable File and Samsung Flash File .